Categories
Uncategorized

How to Repair a Storm-Damaged Fence

Broken wooden fence panel
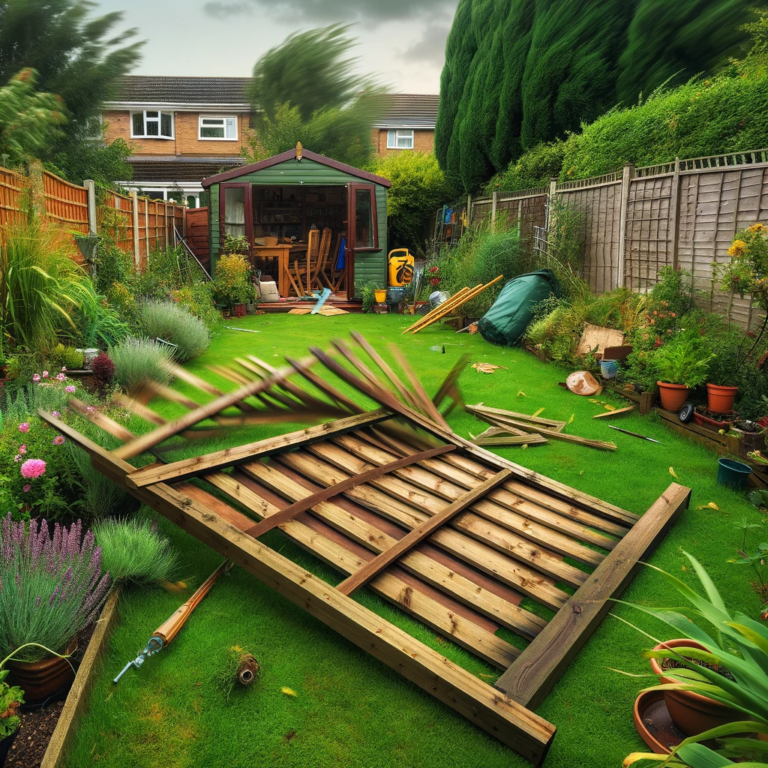
When faced with the unfortunate situation of a storm-damaged fence, it’s essential to act swiftly and efficiently to restore both the functionality and aesthetics of your property. Our team of experts is here to guide you through the step-by-step process of repairing a storm-damaged fence, ensuring your fence not only stands strong but also enhances the overall appeal of your garden.

1. Assessing the Extent of Damage

The first step in addressing a storm-damaged fence is to thoroughly assess the extent of the damage. This initial evaluation will help you determine the necessary materials and steps for the repair. Consider the following:
  • Type of Damage: Determine whether the fence has been uprooted, has broken panels, or has suffered structural damage.
  • Material: Identify the material your fence is made of, as different materials may require distinct repair approaches.
  • Measurement: Measure the length and height of the damaged section, which will be crucial when acquiring replacement parts.
  • Hardware Inspection: Check for loose screws, nails, or hinges that may need tightening or replacement.

2. Gathering the Required Tools and Materials

To execute a successful fence repair, you’ll need the right tools and materials. Here’s a comprehensive list to ensure you’re well-prepared:
  • Replacement Panels: Acquire replacement panels that match the material and style of your existing fence if significant sections are damaged.
  • Tools: Gather essential tools, including a saw, hammer, screwdriver, pliers, level, and measuring tape.
  • Fasteners: Ensure you have an adequate supply of screws, nails, or bolts, depending on your fence’s construction.
  • Safety Gear: Prioritize safety by wearing goggles, gloves, and a dust mask during the repair process.

3. Removal of the Damaged Section

Begin the repair process by carefully removing the damaged section of the fence. Take precautions to avoid further damage to adjacent areas. Depending on the extent of the damage, you may need to:
  • Unscrew or unbolt panels that are salvageable.
  • Use a saw to cut away damaged portions of wooden fences, ensuring a clean and straight edge for later repairs.

4. Installing Replacement Panels

For fences with significant damage, replacing panels is often the best course of action. Follow these steps to ensure a secure and visually appealing installation:
  1. Align the replacement panel with the existing fence, ensuring it matches in terms of style, height, and color.
  2. Use the appropriate fasteners to secure the panel in place, ensuring it’s level and securely attached.

5. Repairing Cracks and Holes

For minor damage such as cracks or holes, follow these steps to restore your fence’s integrity:
  1. Clean the damaged area, removing any debris or loose material.
  2. Apply an appropriate filler or patching compound, following the manufacturer’s instructions.
  3. Once the filler has dried, sand the area smooth to create a seamless finish.
  4. Paint or stain the repaired section to match the rest of the fence, ensuring a uniform appearance.

6. Reinforcing Loose Panels

If your fence has loose panels that haven’t suffered significant damage, these steps will help restore stability:
  1. Identify and tighten any loose screws, nails, or bolts that secure the panels.
  2. Inspect adjacent panels for loose fasteners and secure them as well to prevent future issues.

7. Adding Finishing Touches

To complete the repair process and ensure your fence remains durable and visually appealing, consider these final steps:
  • Paint or Stain: Apply a fresh coat of paint or stain to the entire fence for a cohesive and protective finish.
  • Weatherproofing: Apply a weatherproof sealant to prolong the life of your fence and protect it from future damage caused by the elements.
  • Regular Maintenance: Schedule routine inspections to catch potential issues early and prevent storm damage in the future.
By following these comprehensive steps, you can effectively repair a storm-damaged fence and restore the security and beauty of your property. Don’t let storm damage keep your garden from looking its best – take action today and enjoy a strong, resilient fence for years to come.
Categories
Uncategorized

How to put up a wooden garden fence panel?

How to Put Up a Wooden Garden Fence and All You Need to Know

Installing a fence can be a daunting task for many homeowners, but it doesn’t have to be. With the right tools, materials, and a bit of know-how, you can successfully install a fence that not only enhances the look of your property but also provides privacy and security.

At [company name], we specialize in helping homeowners achieve their dream outdoor space, and fence installation is just one of the many services we offer. In this guide, we’ll walk you through the process of installing a fence step by step, from selecting the right materials to finishing touches.

Step 1: Planning and Preparation

Before you start digging holes and setting posts, you’ll want to take the time to plan out your fence installation. This involves measuring your property, choosing the type of fence you want, and selecting the appropriate materials.

Measure Your Property

The first step in planning your fence installation is to measure the area where you want to install the fence. Use a measuring tape to determine the length and width of your property, and mark any areas that need special consideration, such as slopes or uneven terrain.

Choose Your Fence Type

Next, you’ll want to choose the type of fence that best suits your needs. This could be a picket fence for decorative purposes, a privacy fence for security and seclusion, or a ranch-style fence for livestock or pet containment. Consider the style of your home and the purpose of the fence when making your decision.

Select Your Materials

Once you’ve determined the type of fence you want, it’s time to select your materials. At [company name], we offer a wide range of fencing materials, including wood, vinyl, and metal. Consider factors such as durability, maintenance, and cost when choosing your materials.

Step 2: Fence Installation

With your planning and preparation complete, it’s time to start the fence installation process.

Mark Your Fence Line

The first step in fence installation is to mark your fence line. This is done by placing stakes at the corners of your property and running a string between them to create a straight line. Use a measuring tape to ensure your fence line is level and square.

Dig Post Holes

Next, it’s time to dig post holes. Use a post-hole digger or auger to dig a hole for each fence post, ensuring that each hole is deep enough to support the height of your fence.

Set Fence Posts

With your post holes dug, it’s time to set your fence posts. Place each post in the hole and add concrete to secure it in place. Use a level to ensure each post is plumb and adjust as necessary.

Install Fence Panels

Once your fence posts are set, it’s time to install your fence panels. This involves attaching the panels to the posts using brackets or screws. Use a level to ensure your panels are straight and adjust as necessary.

Add Finishing Touches

With your fence panels in place, it’s time to add any finishing touches. This could include adding a gate or decorative elements such as post caps or finials.

Step 3: Maintenance

Proper maintenance is essential to ensure the longevity of your fence. This includes regular cleaning and inspection, as well as addressing any damage or wear and tear.

Cleaning

Regular cleaning is important to prevent dirt and grime buildup on your fence. Use a mild soap and water solution and a soft-bristled brush to clean your fence, and rinse thoroughly with a garden hose.

Inspection

Regular inspection of your fence is important to identify any damage or wear and tear. This could include loose or broken panels, as well as damage from weather or pests.

Repair

If you notice any damage to your fence, it’s important to address it promptly. This could involve replacing broken panels